

Host a simple snake game on your website
Host a simple snake game with existing code


You can easily host a simple snake game on your website, using code and a hosting service. You may not know coding or even the names of some programming languages. But, don’t worry. I can help you do it, with code which already exists. All you have to do is, link them & host them. Have a look at mine.
And no, you don’t need any money to do this as well. Sounds cool, right ? Let’s proceed now.
I have used infinityfree.net, to create a free account. I suggest that you sign up there as well, before you start doing this.
There are broadly two things we have to do. Let me walk you through this.
- Get the code to run a game and link them properly.
- Host it on the internet.
Part One: Getting the Code Ready.
Let’s first get the code. Here, I am using a simple example, so I have taken it from Freecodecamp’s website. It’s from an article written by Fakorede Damilola. He has used Javascript to create the game code.
It’s primarily of 3 components.
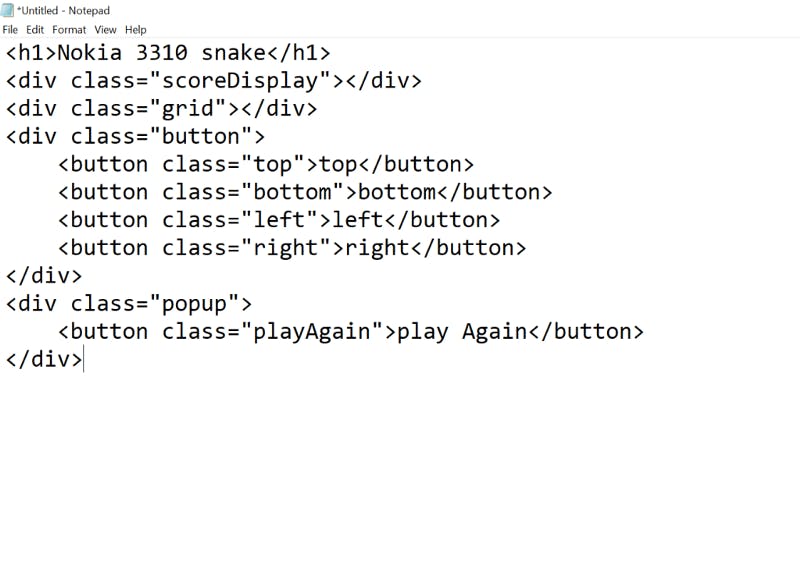
1. HTML Part
I have copy-pasted the code here, for your reference.
<h1>Nokia 3310 snake</h1> <div class="scoreDisplay"></div> <div class="grid"></div> <div class="button"> <button class="top">top</button> <button class="bottom">bottom</button> <button class="left">left</button> <button class="right">right</button> </div> <div class="popup"> <button class="playAgain">play Again</button> </div>
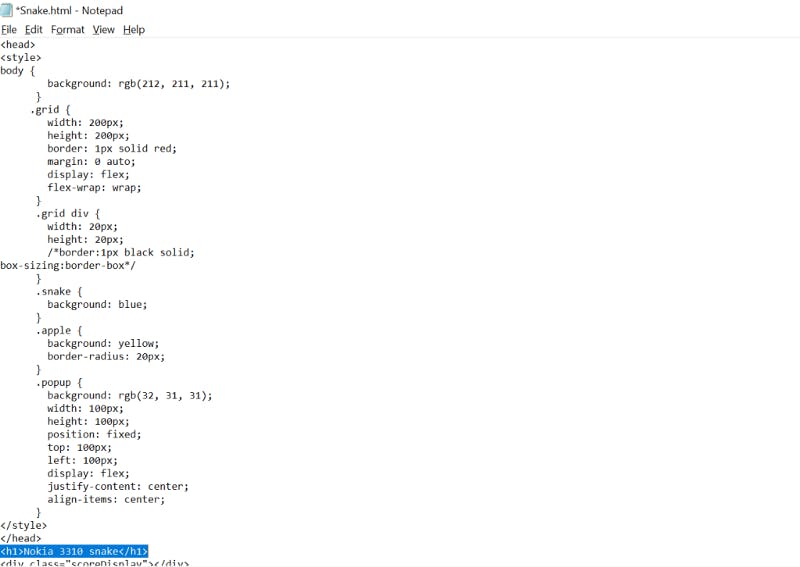
2. CSS Part
This is for the styling of the snake and the area in which it moves.
body { background: rgb(212, 211, 211); } .grid { width: 200px; height: 200px; border: 1px solid red; margin: 0 auto; display: flex; flex-wrap: wrap; } .grid div { width: 20px; height: 20px; /\*border:1px black solid; box-sizing:border-box\*/ } .snake { background: blue; } .apple { background: yellow; border-radius: 20px; } .popup { background: rgb(32, 31, 31); width: 100px; height: 100px; position: fixed; top: 100px; left: 100px; display: flex; justify-content: center; align-items: center; }
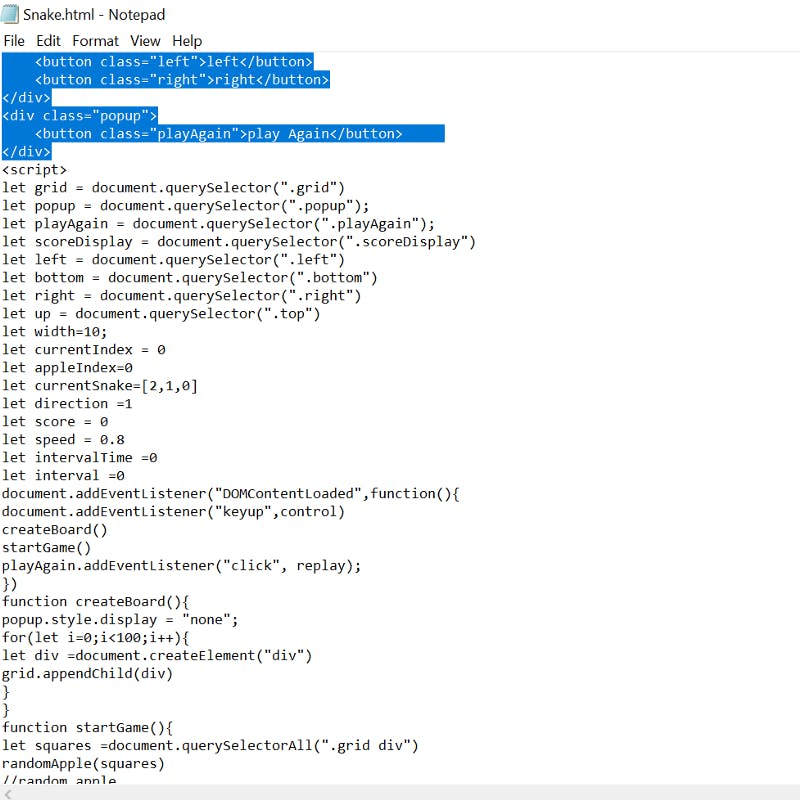
3. Javascript Part
This is the little tricky side of it. But, read on. It’s not impossible.
I’m copying the whole part of the Javascript here, for your convenience. If you wish to study each code block, it’s better to refer to the article.
let grid = document.querySelector(".grid") let popup = document.querySelector(".popup"); let playAgain = document.querySelector(".playAgain"); let scoreDisplay = document.querySelector(".scoreDisplay") let left = document.querySelector(".left") let bottom = document.querySelector(".bottom") let right = document.querySelector(".right") let up = document.querySelector(".top") let width=10; let currentIndex = 0 let appleIndex=0 let currentSnake=\[2,1,0\] let direction =1 let score = 0 let speed = 0.8 let intervalTime =0 let interval =0 document.addEventListener("DOMContentLoaded",function(){ document.addEventListener("keyup",control) createBoard() startGame() playAgain.addEventListener("click", replay); }) function createBoard(){ popup.style.display = "none"; for(let i=0;i<100;i++){ let div =document.createElement("div") grid.appendChild(div) } } function startGame(){ let squares =document.querySelectorAll(".grid div") randomApple(squares) //random apple direction =1 scoreDisplay.innerHTML=score intervalTime=1000 currentSnake =\[2,1,0\] currentIndex = 0 currentSnake.forEach(index=>squares\[index\].classList.add("snake")) interval = setInterval(moveOutcome,intervalTime) } function moveOutcome (){ let squares =document.querySelectorAll(".grid div") if(checkForHits(squares)){ alert("you hit something") popup.style.display="flex" return clearInterval(interval) }else{ moveSnake(squares) } } function moveSnake(squares){ let tail = currentSnake.pop() squares\[tail\].classList.remove("snake") currentSnake.unshift(currentSnake\[0\]+direction) // movement ends here eatApple(squares,tail) squares\[currentSnake\[0\]\].classList.add("snake") } function checkForHits(squares){ if( (currentSnake\[0\] + width >=(width\*width) && direction === width) || (currentSnake\[0\] % width ===width -1 && direction ===1) || (currentSnake\[0\] % width === 0 && direction === -1) || (currentSnake\[0\] - width <= 0 && direction === -width) || squares\[currentSnake\[0\] + direction\].classList.contains("snake") ){ return true }else{ return false } } function eatApple(squares,tail){ if(squares\[currentSnake\[0\]\].classList.contains("apple")){ squares\[currentSnake\[0\]\].classList.remove("apple") squares\[tail\].classList.add("snake") currentSnake.push(tail) randomApple(squares) score++ scoreDisplay.textContent = score clearInterval(interval) intervalTime = intervalTime \*speed interval = setInterval(moveOutcome,intervalTime) } } function randomApple(squares){ do{ appleIndex =Math.floor(Math.random() \* squares.length) }while(squares\[appleIndex\].classList.contains("snake")) squares\[appleIndex\].classList.add("apple") } function control(e){ if (e.keycode===39){ direction = 1 // right }else if (e.keycode===38){ direction = -width //if we press the up arrow, the snake will go ten divs up }else if (e.keycode===37){ direction = -1 // left, the snake will go left one div }else if (e.keycode===40){ direction = +width // down the snake head will instantly appear 10 divs below from the current div } } up.addEventListener("click",()=>direction= -width ) bottom.addEventListener("click",()=>direction= +width ) left.addEventListener("click",()=>direction= -1 ) right.addEventListener("click",()=>direction= 1 ) function replay() { grid.innerHTML="" createBoard() startGame() popup.style.display = "none"; }
Now, you have got the 3 code blocks from the article. But, do you know how it must be used? This is where I’m going to teach you how to use code and link them, so that a program works !
Step 1
Copy the HTML code into a notepad file. Like this. You can alternatively use Visual Studio too, it works fine for writing the code.
Step 2
Add a tag above the HTML Code you entered, previously. Inside that, add tags.
Now, copy the CSS code in between the tags. Like this.
It must be like this, above the HTML code you pasted. I have highlighted the portion where the HTML code begins.
Step 3
Now let’s add the Javascript part into this file. Go to the end of the HTML Script you wrote. It ends at . Create a tag and then copy paste the Javascript code in between the tag. Here is an illustration. I have selected the HTML code, to make it clearer, for you.
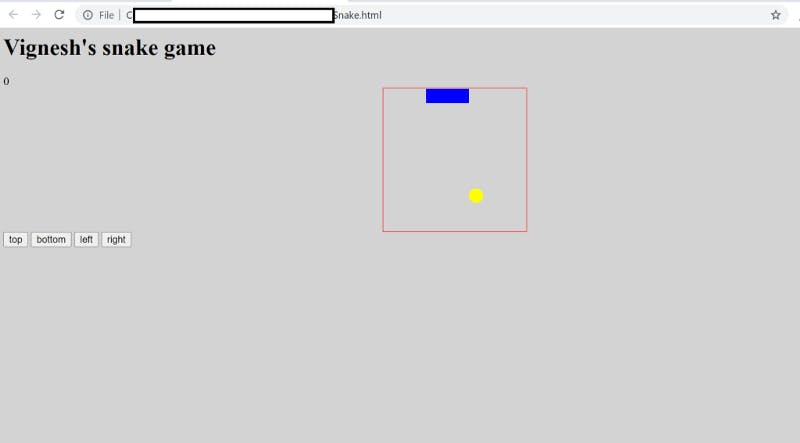
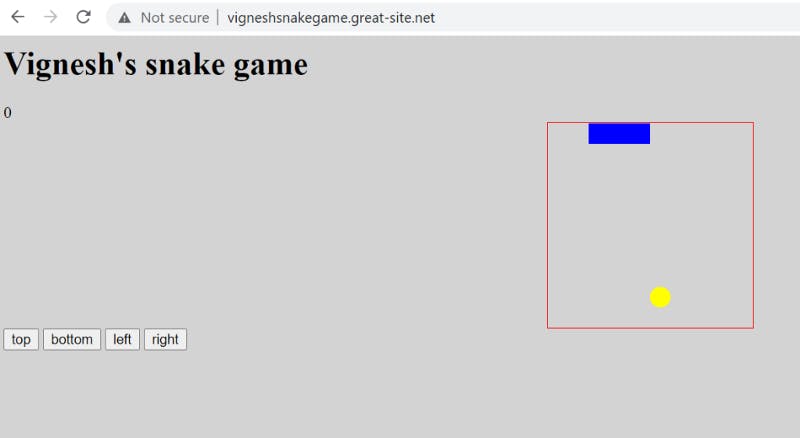
Now, save this file with any name of your choice and add a “.html” extension to it. Do not save it as a text file. Try to open it in your machine, to test if it works. This is how your screen will be. I added my name to the code, hence it shows up.
You can add your’s too, by editing the HTML code.
Part Two: Hosting the Code.
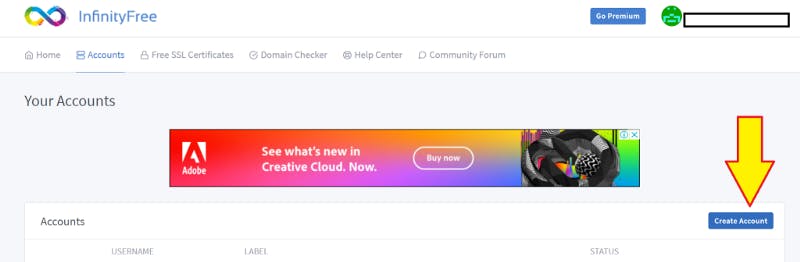
Now that the code is ready, let’s host it. Go to infinityfree.net and login to the account you created.
Click on the Create Account button as shown in the picture below.
Select a domain name and its extension, which is unique. Proceed.
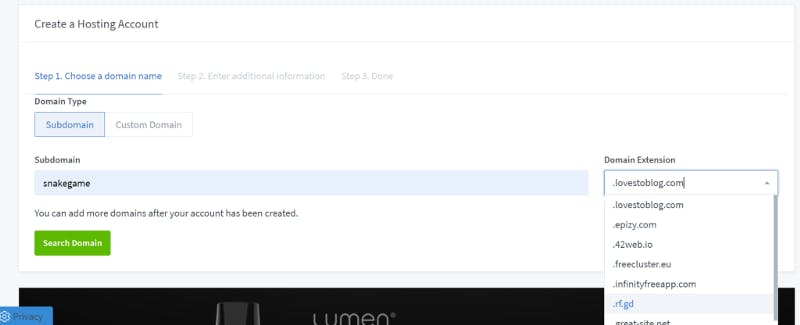
Create a password for it and Proceed.

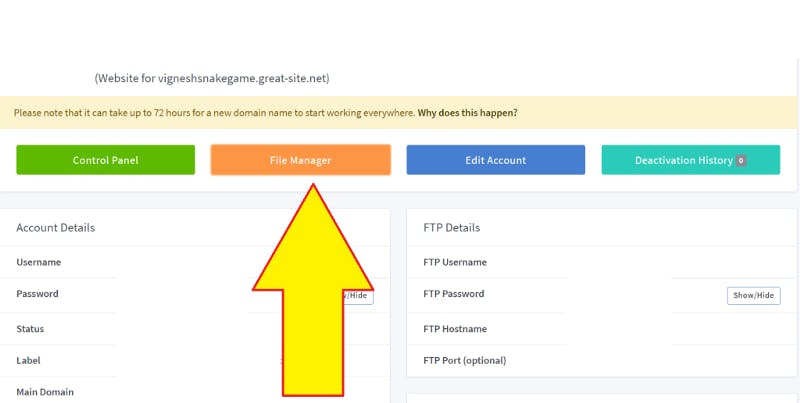
Now, this is the screen you will see.
Let’s get back to it. Click on the File Manager, to open it. Like this:
This is what you’ll see. Open the htdocs folder and upload your .HTML file into it. It was the one we created in Part One. Ensure that it’s named as . Or the game may not load from the link.
Go to the link you made on your infinityfree.net account and access the game. You can modify the file contents any time and update the file in your account.
Hope this article helped you understand the hosting of code.